
Windows 10 has been the best upgrade ever. After windows 7, windows 8 was a bit hard to use. The windows 8 was a little complicated but after the launch of windows 10, almost everyone switched to windows 10 as it seemed to be the best and easy to use.
The most basic thing is the installation and uninstallation of the windows 10. It’s pretty easy to install windows 10 like the previous windows. But, if someone needs to uninstall the windows it’s not that much difficult too. Moreover, you can easily uninstall the windows 10 and revert to the previous version of the windows you have been using on your device.
You just have to follow the following steps in order to revert to the previous version of the windows.
Uninstallation of the Windows 10
- To uninstall Windows 10, go to Start menu then click on Settings.
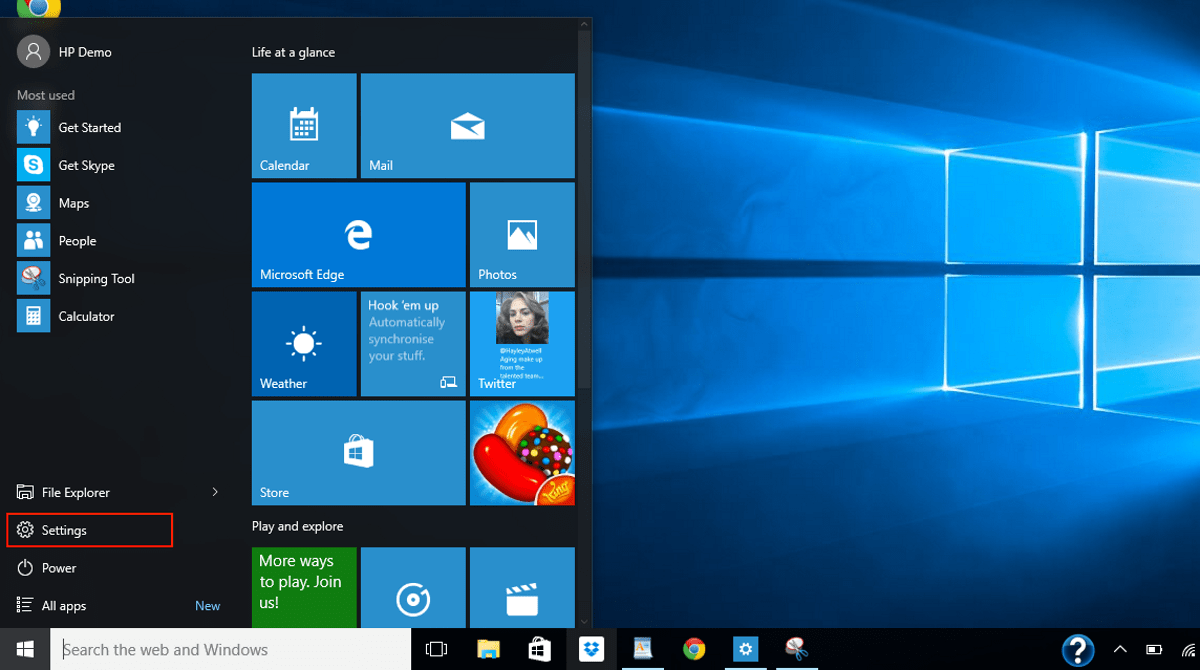
- Then click on Update & security,

- Finally, select Recovery to the left of the window.

(Start > Settings > Update & security, and then select Recovery).
Starting the Uninstallation
Look on the right of the window and you should see an option for Go back to Windows 7 or 8. Now click the Get started button below to begin the uninstallation process.

Wait While the Uninstallation Completes
Uninstallation will take a while and Windows 10 will ask why you’re removing it. After a couple of warnings, your PC will restart and Windows 10 will be uninstalled. This can take anything up to an hour, depending on your PC, but there’s nothing you need to do while it’s in progress.
Check Everything is Still Working
When Windows 10 has been removed, you’ll be back at the Windows 7 or 8 Desktop. It’s worth checking that everything is working normally at this stage and that your important files are intact. You will also need to install any software you installed under Windows 10.


