Home Blog Page 17

How Does Cloud Computing Work Technology Explained

0
Cloud Computing

An increasingly common phrase in today’s ever-changing technological lexicon is “Cloud Computing.” A major paradigm change in data storage, access, and application management has occurred, and the term is more than simply a buzzword. To explain the technology to those who are interested, let’s go into the details of how cloud computing works.

Essential Elements of Cloud Computing

Cloud Computing

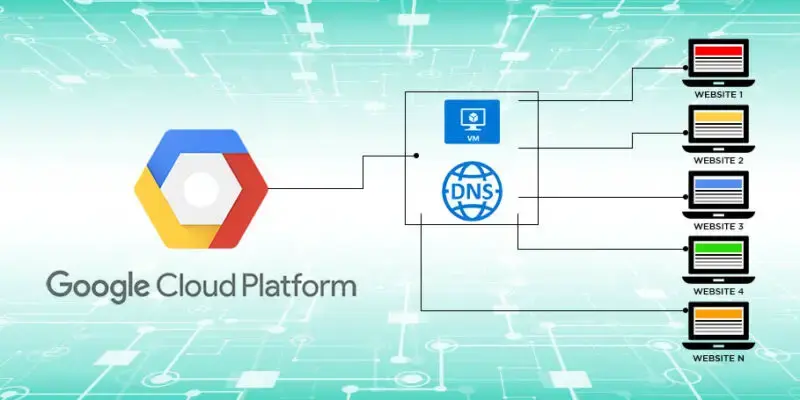
Virtualization and powerful servers are the backbone of the cloud. Virtualization guarantees efficient resource utilization by establishing virtual instances of servers, which host programs and store data.

The Backbone of the Network

Cloud services rely on a solid networking architecture to link consumers to data centers in an effortless manner. The lightning-fast data transit from the user’s device to the Cloud Computing servers is guaranteed by this.

Storage of Data

Modern data storage technologies, such as distributed databases and scalable storage systems, are the backbone of cloud computing. Because of this, users may efficiently store and retrieve massive volumes of data.

Cloud Service Models

Virtual computers and storage space may be rented through IaaS, which offers virtualized computing resources across the internet. This removes the requirement for actual hardware while providing flexibility.

SaaS Software Platform

Platform as a service (PaaS) provides a framework that lets programmers create, launch, and oversee software applications without being concerned with the underlying system. The process of development is made easier by it.

SaaS Model as a service

(SaaS) allows users to access web-based software programs through a subscription model. Reduced maintenance efforts are achieved since users may access these programs without installation.

Models for Deployment

The Shared Cloud

Public clouds are those that everyone may use; they run by independent companies. Though they may cause security issues, they are cost-effective and scalable.

Personal Cloud

With private clouds, a single organization has complete command over all resources and data, making them more secure and convenient. They work well for companies that have stringent regulations to follow.

Cloud Computing’s Benefits

With cloud computing, companies may pay for the resources they really utilize, rather than for the infrastructure as a whole. Saving money and making better use of funds are the outcomes of this.

When demand is high, cloud services may scale up to meet it, and when demand is low, they can scale down to save money. The mobility of cloud computing has made it possible for users to collaborate and work remotely from any location with an internet connection. Productivity and flexibility both improved by this accessibility.

Protecting Personal Information

Data privacy and regulatory compliance are important considerations when storing information in the cloud. It is critical to guarantee data encryption and adhere to privacy regulations.

FAQ

How safe is storing data on the cloud?

Users are responsible for enhancing data security by using best practices and encrypting data, in addition to the strong security measures used by cloud providers.

Can cloud computing be useful for small businesses?

Without a doubt. The scalability, accessibility, and low-cost solutions offered by cloud computing may greatly improve the operations of small enterprises.

Can you name any drawbacks to utilising cloud services?

Cloud service disruptions are uncommon but still need action to address data privacy and security issues.

What directions will cloud computing go in the next years?

Some of the upcoming developments in cloud computing include edge computing, quantum computing integration, and advances in artificial intelligence and machine learning.

Conclusion

 Cloud Computing is changing the way we use data and apps as we move across the ever-changing tech world. Its ongoing development holds great potential, positioning it as an essential player in the digital age.

Who Invented the Cloud: Unraveling the Minds Behind the Invention

0
Who Invented the Cloud

Who Invented the Cloud? In the dynamic landscape of modern technology, the advent of cloud computing has revolutionized the way businesses operate and individuals interact with data. The cloud has become an integral part of our digital lives, but who are the masterminds behind this transformative innovation?

Who Invented the Cloud

Who Invented the Cloud? – The Genesis of Cloud Computing

Conceptual Roots: J.C.R. Licklider and ARPANET (1960s)

The seeds of cloud computing were planted in the visionary mind of J.C.R. Licklider, an American psychologist and computer scientist. In the 1960s, Licklider envisioned a future where computers would be interconnected and accessible from anywhere. His vision gained traction with the development of ARPANET, the precursor to the modern internet. The idea of sharing computing resources remotely began to take shape.

Virtualization Pioneers: IBM and Mainframes (1970s)

While the conceptualization of remote computing took root, the actual groundwork for cloud computing began with the advent of virtualization. IBM played a crucial role in this phase, introducing mainframes that allowed multiple users to share resources simultaneously. This laid the foundation for the efficient use of computing power, a key principle of cloud computing.

Who Invented the Cloud? – The Birth of the Term “Cloud Computing”

The Coined Term: Eric Schmidt and Google (2006)

The term “cloud computing” was officially coined in 2006 when Google’s then-CEO, Eric Schmidt, used it at an industry conference. Google was already pioneering cloud services with products like Gmail and Google Docs, setting the stage for the broader adoption of cloud-based solutions.

Who Invented the Cloud? Trailblazers in Cloud Services

Amazon Web Services (AWS): Jeff Bezos and the Elastic Compute Cloud (EC2)

Amazon Web Services (AWS) is widely regarded as a trailblazer in cloud computing. Launched in 2006, AWS was spearheaded by Jeff Bezos, the visionary founder of Amazon. The introduction of Elastic Compute Cloud (EC2) marked a turning point, allowing users to rent virtual servers on a pay-as-you-go basis. This model made scalable computing resources accessible to businesses of all sizes, democratizing the power of the cloud.

Microsoft Azure: Satya Nadella and Cloud Transformation

Microsoft entered the cloud arena with Azure, led by CEO Satya Nadella. Azure, launched in 2010, became a formidable competitor to AWS. Nadella’s strategic vision emphasized the integration of cloud services with Microsoft’s existing products, facilitating a seamless transition for businesses into the cloud era.

Google Cloud Platform (GCP): Diane Greene and Thomas Kurian

Google, with its vast experience in cloud-based services, joined the race with Google Cloud Platform (GCP). Diane Greene and later Thomas Kurian led Google’s efforts to provide scalable and advanced cloud solutions, leveraging the company’s expertise in data management and analytics.

Who Invented the Cloud? – The Evolution Continues

The Role of Open Source: Cloud Foundry and Kubernetes

The evolution of cloud computing also owes much to the open-source community. Platforms like Cloud Foundry and container orchestration tools like Kubernetes have played pivotal roles in shaping the cloud landscape. Their collaborative, community-driven development has enabled interoperability and flexibility across various cloud providers.

Edge Computing: Extending the Cloud’s Reach

As technology advances, edge computing has emerged as an extension of cloud computing. This paradigm shift involves processing data closer to the source, reducing latency and enhancing real-time processing capabilities. The evolution of the cloud continues as it expands its reach to the edge.

Conclusion

The invention of the cloud is a collective effort that spans decades and involves the contributions of visionaries, pioneers, and entire communities. From the conceptual dreams of J.C.R. Licklider to the commercialization efforts of giants like Amazon, Microsoft, and Google, the journey of cloud computing has transformed the digital landscape. As we navigate the evolving tech terrain, one thing remains certain – the cloud is not just a place; it’s a revolutionary force that continues to shape the way we live, work, and connect.

A Step-by-Step Guide on How To Host Website On Google Cloud

0
How To Host Website On Google Cloud

How To Host Website On Google Cloud? In today’s digital era, establishing an online presence is crucial for individuals and businesses alike. One of the key elements in building a successful website is choosing a reliable hosting platform. Google Cloud Platform (GCP) offers a robust and scalable infrastructure for hosting websites.

In this guide, we’ll walk you through the steps to host your website on Google Cloud.

How To Host Website On Google Cloud

How To Host Website On Google Cloud?

Step 1: Create a Google Cloud Platform Account

If you don’t have a Google Cloud Platform account, start by signing up. Navigate to the GCP website and follow the registration process. Once your account is set up, access the GCP Console, where you will manage your resources and services.

Step 2: Set Up a Project

After logging in to the GCP Console, create a new project for hosting your website. Projects help you organize and manage your resources effectively. Go to the “Select a project” dropdown menu and click on “New Project.” Follow the prompts to create your project, providing a name and optional project ID.

Step 3: Enable Billing and APIs

Before proceeding, ensure that billing is enabled for your project. Google Cloud Platform provides a free tier with limited resources, but hosting a website may require additional resources that fall outside the free tier.

Next, enable the necessary APIs. Go to the “APIs & Services” section in the GCP Console, click on “Dashboard,” and then select the “+ ENABLE APIS AND SERVICES” button. Enable the Compute Engine API, Cloud Storage API, and other relevant APIs for your website.

How To Host Website On Google Cloud – The Next Steps

Step 4: Set Up a Virtual Machine (VM) Instance

A virtual machine will host your website on Google Cloud. In the GCP Console, navigate to “Compute Engine” and click on “VM instances.” Select the “+ CREATE INSTANCE” button and configure your VM according to your website’s requirements. Choose the operating system, machine type, and specify the boot disk.

Step 5: Install a Web Server

Once your VM instance is set up, connect to it using SSH. Install a web server on your virtual machine; Apache and Nginx are popular choices. Use the package manager for your chosen operating system to install the web server software. For example, on a Debian-based system, you can use the following commands to install Apache:

Step 6: Deploy Your Website Files

Upload your website files to the virtual machine. You can use tools like SCP (Secure Copy Protocol) or SFTP (Secure File Transfer Protocol) to transfer files to your VM. Alternatively, consider using Cloud Storage to store and serve your static website files. Make sure to configure the web server to point to the correct directory where your website files are located.

Step 7: Configure Domain and DNS

To make your website accessible via a custom domain, configure the domain and update the DNS records. In the GCP Console, navigate to “Network Services” and select “Cloud DNS.” Create a new zone for your domain and add the necessary DNS records, including A records pointing to the IP address of your VM instance.

How To Host Website On Google Cloud – Final Steps

Step 8: Configure Firewall Rules

Ensure that your VM instance is accessible from the internet by configuring firewall rules. In the GCP Console, go to “VPC Network” and select “Firewall.” Create a new firewall rule that allows traffic on port 80 (HTTP) and 443 (HTTPS) to reach your VM instance.

Step 9: Set Up SSL/TLS Encryption (Optional)

For enhanced security, consider setting up SSL/TLS encryption for your website. You can obtain a free SSL certificate from Let’s Encrypt or use Google Cloud’s SSL/TLS service. Configure your web server to use the SSL certificate, ensuring that your website is served over HTTPS.

Step 10: Monitor and Scale Resources

Monitor your website’s performance and resource usage using Google Cloud Monitoring tools. If your website experiences increased traffic, consider scaling your resources to meet the demand. Google Cloud provides auto-scaling options to dynamically adjust resources based on traffic patterns.

By following these steps, you can successfully host your website on Google Cloud Platform. Remember to regularly monitor your resources, optimize performance, and stay informed about new features and best practices offered by Google Cloud. Hosting your website on GCP ensures reliability, scalability, and access to a wide range of cloud services to enhance your online presence.

Ufone 3G/4G Internet Settings 2024|Manual & SMS

0
Ufone Prepaid Data Roaming Offer

Complete Details About Ufone 3G/4G Internet Settings for Android Users…!

Many people use internet for different purposes in their daily life routines. Some of them know about to configure the Internet/APN Settings for their smartphones but many people don’t know about these settings. Here I am going to tell you about the configuration of Ufone Internet Settings for android smartphones. If you are an Ufone user and want to know about the configuration of Ufone Internet Settings or APN Settings then it’s all according to your needs. It is not a difficult task as many think but it may be a long process.

1. Manual Configuration of Ufone Internet Settings

Ufone Internet Settings

For manual configurations of Ufone Internet Settings in your handset you need to follow the steps below as:

  • Go to the Settings on your android smartphone.
  • Select Wireless and Networks or Mobile Networks option.
  • Tap Access Point Names from here.
  • Here you would see the Menu button and you need to press it to enter the menu.

Now tap New APN box and enter the following information as:

  • APN Type: Internet
  • Name (Ufone GPRS)
  • APN (ufone.pinternet) only for Prepaid Customers
  • APN (ufone.internet) Only for Postpaid Customers
  • APN Type: Internet
  • Press menu button and select Save

Leave the other fields blank there is no need to fill them.

Ufone MMS Settings for Ufone Internet/APN Settings

Ufone Internet Settings

  • Go to Main menu
  • Tap Settings
  • Tap Wireless and networks
  • Tap Mobile Networks
  • Press Use packet data Enabled ON
  • Tap Access point Names
  • Press menu button
  • Tap New APN
  • Name: Ufone MMS
  • APN: (ufone.pmms) Only for Prepaid Customers
  • APN: (ufone.mms) Only for Postpaid Customers
  • MMSC: (http://www.ufonemms.com:80/)
  • MMS Proxy (172.16.13.27)
  • MMS Port (8080)
  • APN Type (MMS)
  • Press menu button and select Save

Leave the other fields blank there is no need to fill them.

More about Ufone Internet Settings

  • Select the APN according to the product
  • Turn ON the Use Packet Data Enabled when you need it otherwise turn it OFF
  • For more details you can called on 333
  • APN for Prepaid (GPRS) is: ufone.pinternet
  • APN for Postpaid (GPRS) is: ufone.internet
  • APN for Prepaid (MMS) is: ufone.mms
  • APN for Postpaid (MMS) is: ufone.mms

2. Ufone Internet Settings via SMS

If you feel this method is tough and lengthy then you can also use SMS service. Through SMS you can also change your Ufone Internet Settings very easily. Just follow these simple steps to configure Ufone APN or Internet Settings in your smartphone. Through SMS service you need to know about the model number of your smartphone.

  • Go to the Messages and type the model number of your handset.
  • After typing your handset’s model send it to 222.
  • Now wait until the Ufone sends you Ufone Internet/APN Settings.

3. Ufone Internet Settings via Call

If you are not satisfied by the above mentioned methods of Ufone Internet Settings then here is another option for you. The third option for configuring the Ufone Internet/APN Settings is through call. For this method you only need to know about your mobile phone’s make and model number. Here are the simple steps as:

  • Dial 333 from your smartphone for talk with Ufone representative.
  • You need to tell him/her just your handset model number and the make.
  • Then he/she would send you the Ufone Internet Settings or APN Settings. You need to save that settings by using the code that would be provided in SMS.
  • Once you applied the settings you need to restart your smartphone for activating the Ufone Internet/APN Service.

Related Article|Subscribe to Ufone Monthly Lite Cashback Offer (Get 20% Cashback & Incentives)

Zong 4G Internet Settings 2024|SMS & Manual

0
Zong Internet Settings

All About Zong Internet Settings or APN Settings for Android Users…!

Using internet is become essential for everyone nowadays. We all use Zong 4G on our handsets for faster and efficient browsing. If you are a zong user and want to know about the Zong Internet Settings or Zong APN Settings then it’s all for you. You can configure your Zong Internet Settings in one of the three ways described below. All these methods are so easy and simple.

1. Zong 4G Internet Settings through Manual Procedure

Zong Internet Settings

The first method of configuring Zong Internet Settings is manually. In this method you go on your mobile phone’s settings and enter the following information for Zong Internet/APN Settings.

  • Go your handset’s Settings
  • Tap Wireless and Networks
  • Tap Mobile Networks
  • Tap Access Point Names (APN)

Now you need to enter the following details for Zong Internet:

  • APN (zonginternet)
  • Login Name left blank
  • Password left blank

Zong 4G Settings for MMS

  • Open Settings > Wireless & networks > Mobile networks > Access Point Names
  • Tap Add button available at the top right corner

Enter the following details as:

  • Name Zong MMS
  • APN (zongmms)
  • Login name left blank
  • Password left blank
  • Wap Gateway IP (10.81.6.33)
  • Port (8000)
  • MCC (410)
  • Authentication Type  (PAP)
  • APN Type (mms)
  • APN Roaming Protocol (IPv4)
  • Relay server/messaging server (http://10.81.6.11:8080)

2. Zong Internet Settings via SMS

To configure the Zong Internet Settings via SMS service is easier than any other method. You have to need to perform only few easy and simple steps for Zong Internet/APN Settings. You only need to send a text message to 2161 short code to get Zong Internet & MMS internet settings of your handset. Follow the following steps as:

  • Go on your messages and type all and send it to 2161.
  • After this the Zong Internet/APN Settings would be sent to you on your android handset.
  • Once Zong Internet Settings are received then enter pin code 1234 and press install button to save the settings.
  • To configure the Zong Internet/APN Settings via SMS is free of cost.

Zong Internet/APN Settings

3. Zong Internet Settings via Call

The third method to configure your Zong Internet Settings or Zong APN Settings on your android smartphones is by calling. You can call from your mobile phone to Zong help line and can change Zong Internet/APN Settings. Here are the details about this simple method.

  • Dial 310 from your Zong Mobile Number.
  • The Zong staff will help you to configure your handset for Using internet is become essential for everyone nowadays. We all use Zong 4G on our handsets for faster and efficient browsing./APN Settings.
  • You make sure that your android smartphone is compatible for Mobile Internet/WAP & MMS services.
  • If your smartphone is compatible for these services then you can configure Zong Internet/APN Settings .

Related Article|Zong Bring New Data SIM Packages – 2018 (Enjoy More GB’s)

Zong WhatsApp Packages 2024 – Daily, Weekly Monthly Bundles

0

Zong WhatsApp Packages: Zong is one of the biggest networks that every year releases new packages for its customers. It is also the first network that introduced 4G in Pakistan. If you are a Zong customer and need some interesting WhatsApp packages, then you are at the right place.

We know that how important it is to stay connected with your friends and office staff and it is possible when you have the internet opportunity. Why go for expensive packages when Zong is offering cheap Whatsapp packages at an affordable rate?

This article will be all about Zong Packages for those who were looking forward to this. Let’s go straight to the point and talk about them in detail. This guide will have each detail about the package, including Cost, Activation code, Validity, Volume, etc.

Zong WhatsApp Packages

Zong Daily WhatsApp Packages: Zong WhatsApp Packages

If you want a WhatsApp package for a single day only then, this package is for you. it will be applied only for a day, depending upon which package you will activate. Let’s figure out which package Zong offers for a day.

Package Name Price Volume Balance Required Duration Activation Code
Zong Daily WhatsApp Package Rs 5 30 MB Data for WhatsApp, 1 MB Internet, and 500 SMS Rs 7 1 Day Dial = *700# Or Send < sub> to 700 and dial 1.

For deactivating the package, Send ‘unsubscribe’ to 700

If you do not use the internet in an excessive amount, then this one-day package would be an ideal choice. Whenever you need a package for a day, you can always activate it. However, don’t forget to deactivate otherwise, your balance will be deducted.

Zong Weekly Whatsapp Package

Now comes the weekly package. If a one-day package is not enough for you and you need to activate it daily then go for a weekly WhatsApp package that is equally good. the weekly package is:

Package Name Price Volume Balance Required Duration Activation Code
Zong WhatsApp Package Weekly Rs 21 200 MB Data for WhatsApp & 1500 SMS Rs 28 7 Days To Subscribe, Dial = *702# Or Send < sub> to 700 and reply with 2. To Unsubscribe Send ‘unsubscribe’ to 700

This package will be enough to pass your entire week without any inconvenience. Furthermore, it will let you connect with your friends 24/7.

Zong Monthly Whatsapp Packages

To me, having a monthly WhatsApp package is always great. You don’t need to activate the package again and again. The best thing about this package is, it is not limited to WhatsApp msgs only. You can also make voice calls and video calls free of cost.

Isn’t it great? Besides this, we have 2 monthly packages. You can go for anyone according to your choice. Let’s figure out them.

Package Name Price Volume Balance Required Duration Activation Code
Zong WhatsApp Monthly Package Rs 38 4 GB Data for WhatsApp Rs 50 Valid for 30 days To Subscribe, Dial = *247# To check remaining data Dial *102#
Zong Whatsapp and Sms Package Monthly Rs 50 30 MB/day for 1 Month 500 SMS/day for 1 Month Rs 66 Valid for 30 Days To subscribe, Dial *705# To unsubscribe, Send ‘unsubscribe’ or ‘unsub’ to 700

I think it is a great package that you should avail if you are looking forward to having any internet package.

Package Terms and Conditions

Now that you have braced yourself with all the packages, now it’s time to know whats terms and conditions apply to these above-mentioned bundles.

  • You can send images, videos to your friends free of cost with these packages.
  • Furthermore, you can make a free call if you have activated any of the package
  • Tax is applied to all the packages.
  • You should be a prepaid user to activate the package.

Follow the rules and thoroughly enjoy Whstapp bundles of Zong as much you want.

4G Internet Packages for TikTok & YouTube– 2024

0
4g

Good 4G internet packages have become a necessity of the people at the moment. With the whole country on lockdown, people are looking for different ways to keep themselves entertained for the longer periods of time. To no one’s surprise, TikTok and YouTube is the entertainment platform of choice of everyone.

However, all this non-stop streaming requires fast internet speed and that can only be achieved by using good 4G internet. Luckily for Pakistani, the Pakistani Telecommunication Companies have some of the best 4G internet packages that you can enjoy at very affordable rates.

Here are some of the best 4G internet packages from four major telecommunication companies in Pakistan.

Zong, Jazz, Telenor & Ufone 4G Internet Packages for TikTok & YouTube– 2024

Zong YouTube & TikTok Bundles

While you do have the option to get smaller packages that don’t cost you more than Rs. 20, the best way to save money and enjoy TikTok and YouTube is by activating a monthly or a weekly package. The best Zong 4G Weekly package is:

zong-weekly

The best monthly 4G package is:

Zong-monthly

Jazz 4G YouTube & TikTok Bundles

No one can beat Jazz when it comes to the best internet connection and internet packages. Jazz currently has the honor of being one the biggest and the favorite network of Pakistanis when it comes to 4G packages. The best weekly Jazz 4G package is:

Youtube
Youtube

The best monthly Jazz 4G package is:

Jazz-monthly

Telenor 4G YouTube & TikTok Bundles

Telenor is another telecommunication company that offers really good 4G internet packages to its consumers. With a wide range of Monthly and Weekly packages to choose from, you can easily find a package that fulfils your streaming needs. The best weekly Telenor 4G package is:

Telenor-weekly

The best monthly Telenor 4G package is:

telenor-monthly

Ufone 4G YouTube & TikTok Bundles

While Ufone packages are not the best in terms of the amount of GBs available, their internet packages are still not to be ignored. The best weekly Ufone 4G package is:

ufone weekly

The best monthly Ufone 4G package is:

ufone-monthly

These are the best 4G internet packages available at the moment by these best companies. Try these out and make sure you enjoy your time on TikTok and YouTube. Pick the one with the most GBs available and spend it on what you love the most.

Jazz Balance Save Code 2024|Doosra Balance, Jazz World App & Code

0
JAZZ

Have you ever called Jazz Helpline to know why your balance is debited every now and then? Jazz Balance Save Code is the recently originated service that let you save your balance that you don’t need at the moment.

This service came into being for the first time in Pakistan by the Mobilink Jazz. It is one of the crucial offers for those who often complain about their balance deduction.

If you have a 4G network and looking for a perfect offer in order to save your balance for important use, you are in the right place. In case, you are not familiar with the term Balance Save code, let’s put a light on it first.

Jazz Balance Save Code

What is Balance Save Code

If you are one of those who make a fuss whenever your balance get discounted without any reason after every internet package, you can avail of this offer in order to save extra balance in your mobile. So that, whenever you need a balance, you can unsaved it without recharging.

Many networks are giving this facility to their customers including JAZZ users. There is a simple process involved to avail this offer. Let’s figure out how to do it.

Jazz Balance Save Code

  • Enter the code *275# in order to activate the offer
  • Once you have entered, you will get the message of subscription
  • Furthermore, you will not be charged for this offer as it is free
  • In order to unsubscribe this offer, you can dial *275*4#

Now you are all done to save your balance from unnecessary deduction.

Other Method / AZZJ Doosra Service

Interestingly, JAZZ is offering 2 methods to let you save your balance. The other method is known as Doosra Balance Service. With this service, another account will be created on your sim and your balance will be transferred to that SIM.

It is how you can save your balance in another account easily.

It is not necessary to transfer the entire balance in a go. You can transfer in pieces too depending upon your requirement. However, the only drawback is this offer is not free as you will be charged on each transfer. Still if you want to avail of this offer, here are the few steps:

  • Dial *869# in order to activate this offer
  • You will receive subscription message on your mobile
  • On each transfer, you have to pay 1 + tax.
  • If you want to unsubscribe the offer, dial *869*3#

How To Withdraw Balance

In case, you want your balance back urgently, you can simply dial the code again and balance will be transferred on your account within no time.

  • Dial *869# from your mobile
  • You will be given various options among which choose 2 option
  • You will be given your balance back

In case, you want to deactivate this offer, dial *869# and go for 3 option. These were the few simple steps involved in this procedure. It is how you can save your balance so that you can use it whenever needed.

Latest Article

Mobile Packages